StorageWorks - Mar 31 2022
Foolproof Furniture Installation Instruction
How to use a cam lock system?

Many of us may feel it's a task impossible to assemble a piece of furniture like this bookcase cabinet. However, it is not as hard as you might think. In fact, it is quite simple to assemble with these cam lock systems. We'll show you how.

What is a cam lock system?
The cam lock system includes two parts: cam lock nuts and cam screws. It's also called knock-down fasteners or cam fasteners. Cam screws, known as cam post or cam dowel as well, are long metal sticks with a threaded end and head, while cam lock nuts are cylindrical metal pieces with circumferential grooves.
How to install a cam lock system on the furniture?
Find the pre-drilled holes for cam lock nuts and cam screws, respectively. The holes should be on two different boards that connect at a vertical angle. And the holes for cam lock nuts should be larger than those for cam screws.

Twist the cam screws into the smaller holes with its threaded head facing the furniture board. Screw carefully and stop where it ends and make sure not to over-torque it, as it could result in stripping screws, causing failure of the cam lock system. Then, attach the board carefully with pre-drilled holes on for cam nuts to the cam lock nuts (use a hammer to push in if need be).
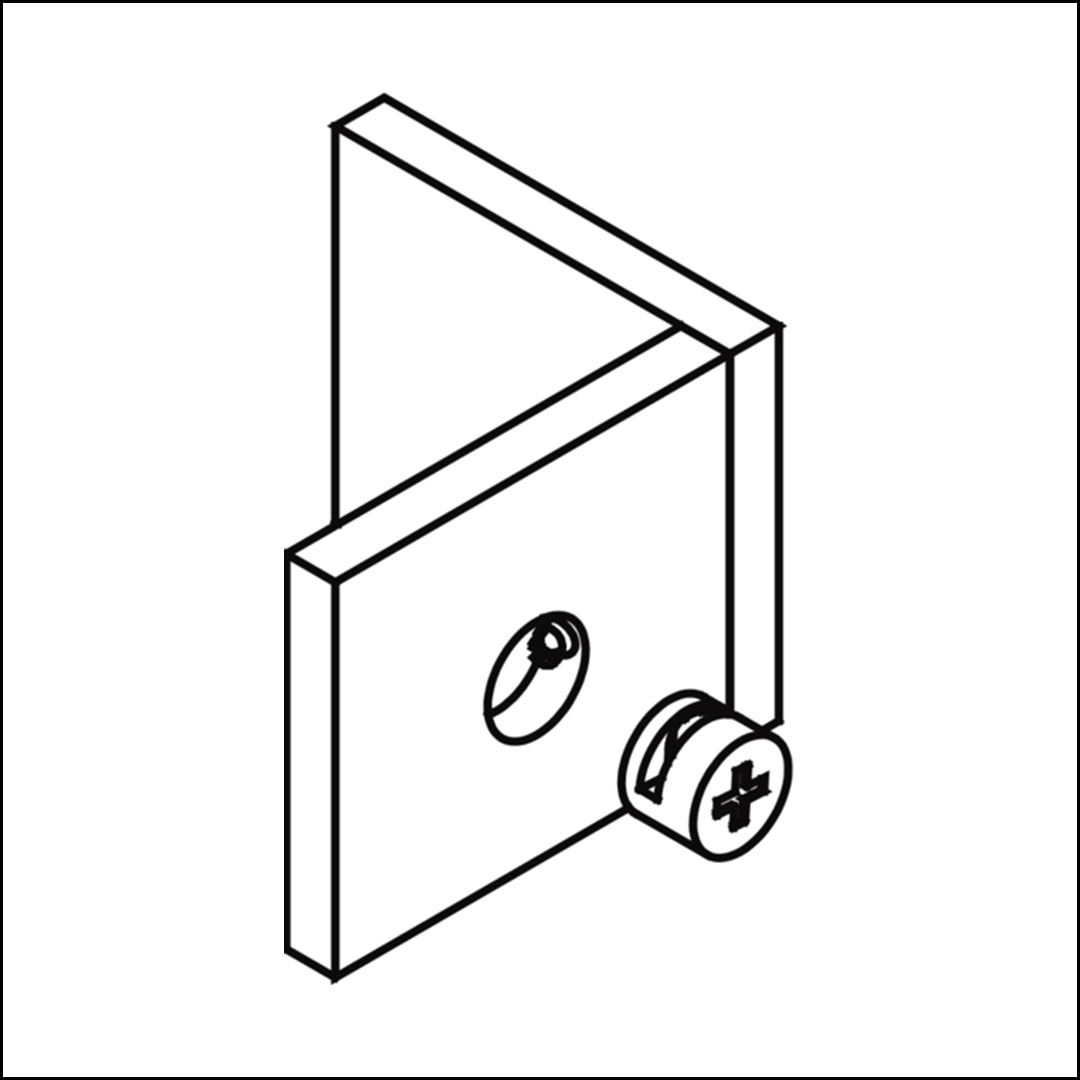
With the boards attached correctly, you can actually see the head of the cam screw from outside the cam nut hole. You may notice that there's an opening on the cylindrical cam lock nut. Put the nut into its matching hole, with the opening shape facing the head of the cam screw.
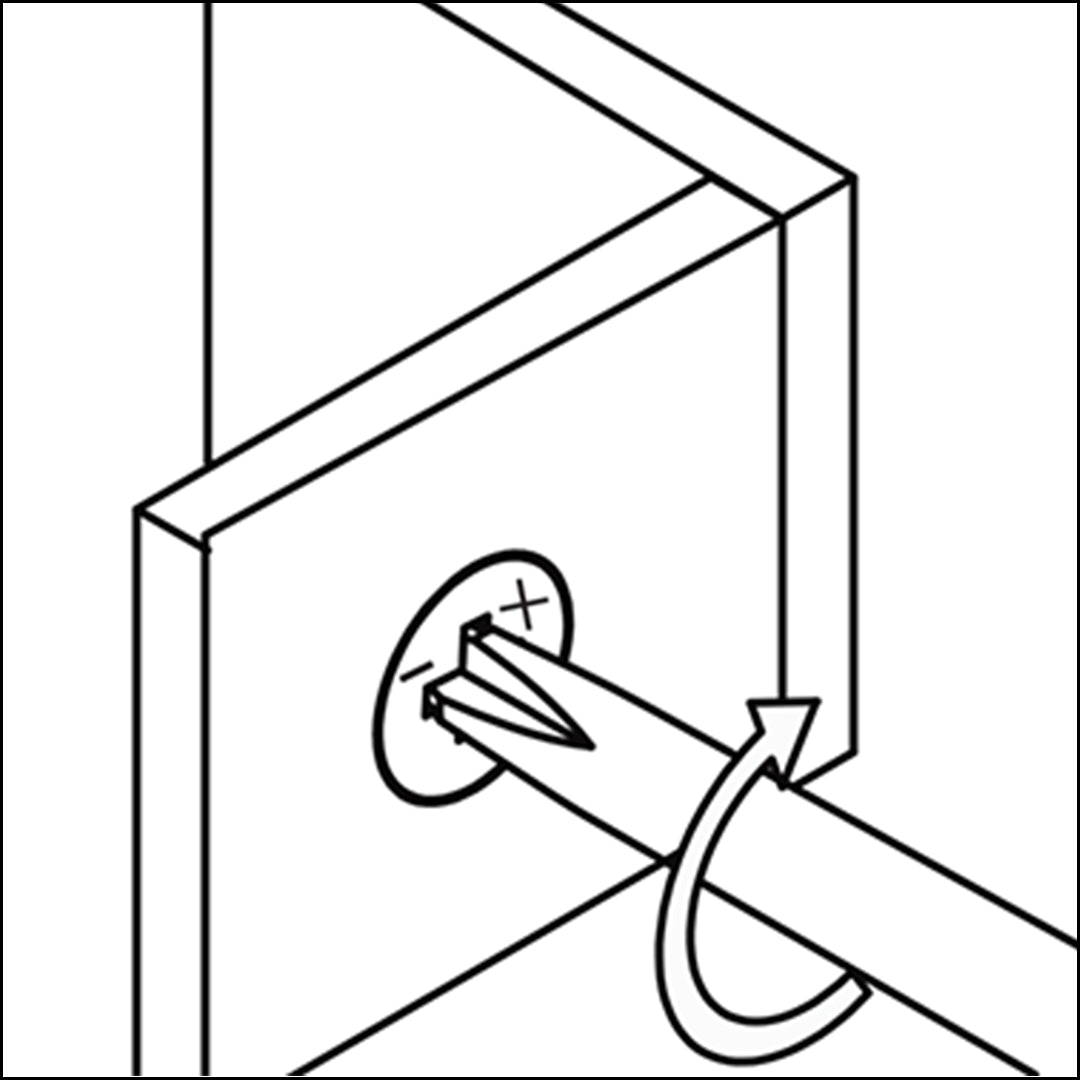
Use a flathead screwdriver to twist the nut clockwise (towards the "+" mark), and stop where it ends. And then, the system is locked.
All you need to do are to follow the assembly instruction video, make sure every dowel is in place, and not to over-torque any screw. Simple, isn't it?
Related Posts

5 Simple Hacks to Refresh and Organize Your Home This Spring